If you are looking for fun and engaging crafting ideas, look no further! Air-dry clay trinket dishes are not only an enjoyable project but also a versatile option for both beginners and seasoned crafters. This affordable material hardens effortlessly without a kiln, making it accessible to all ages. With popular brands like DAS and Crayola offering quality clay options, creating unique handmade clay products is a breeze. These charming dishes can hold small items, be gifted to friends, or be displayed as lovely décor pieces. Plus, they can be painted or sealed to enhance their appearance and durability.
Key Takeaways
- Air-dry clay trinket dishes are easy and fun to make.
- Accessible materials like DAS and Crayola make crafting enjoyable.
- They serve multiple functions, from holding items to being decorative pieces.
- Perfect project for crafters of all ages.
- Can be personalized with paint or sealant for a unique touch.
Marbled clay ring holders

Creating stunning marbled clay ring holders offers a blend of aesthetics and functionality. This craft not only enhances your home decor but also serves as a perfect way to organize your favorite rings. The process allows for personal expression as you mix different colors of air-dry clay to form unique patterns. This project is ideal for both beginners and those looking to refine their pottery projects. A handmade clay ring holder makes for an exceptional homemade gift as well.
Shopping list
- Air-dry clay in various colors
- Rolling pin
- Craft knife
- Sealant (optional)
- Cutting board or surface
Instructions
- Start by preparing your workspace and gathering all necessary materials.
- Choose two or more colors of clay. Roll each color into a snake shape.
- Twist the colored snakes together to create a marbled effect.
- Flatten the marbled clay using the rolling pin to your desired thickness.
- Use a craft knife to cut out a circle or desired shape for the ring holder.
- Cut a small notch in the center to securely hold the rings.
- Allow the clay to dry completely, following the manufacturer’s recommendations.
- If desired, apply a sealant for extra durability and gloss.
Clay plant pot miniatures

Creating charming clay plant pot miniatures offers a delightful way to showcase your favorite small plants or succulents. These handmade clay pots add a personal touch to your space and are perfect for both indoor and outdoor decor. Engaging in these clay art projects can be a fun and rewarding hobby for all skill levels.
Shopping list
- Air-dry clay
- Sculpting tools
- Small plants or succulents
- Paint (optional)
- Paintbrush (optional)
Instructions
- Start by taking a handful of air-dry clay and kneading it until soft and pliable.
- Shape the clay into the pot size you desire, ensuring the base is flat for stability.
- Use sculpting tools to create texture and design on the outer surface of your pot.
- Allow the pot to dry according to the clay manufacturer’s instructions.
- If desired, paint the dried pot to add a splash of color or unique patterns.
- Finally, plant your small succulent or greenery to complete your mini clay crafts.
Stamped clay gift tags

Creating stamped clay gift tags offers an excellent opportunity to add a personal touch to your presents. These handmade tags are perfect for birthdays, holidays, or any special occasion. Using air-dry clay, you can design unique patterns that enhance the overall presentation of your gifts. The process is enjoyable, allowing you to express your creativity as you craft. Follow the easy steps below to make your own beautiful clay gift tags that will impress anyone who receives them.
Shopping list
- Air-dry clay
- Clay rolling pin
- Stamps or engraved tools
- String or twine for hanging
- Clay cutting tool
- Sandpaper (optional)
Instructions
- Begin by rolling out a slab of air-dry clay to your desired thickness, usually around 1/4 inch.
- Using a clay cutting tool, cut out the shapes for your gift tags. Classic rectangles or playful shapes add fun to your clay gift tags.
- Please select your favorite stamps or tools and press them into the clay to create unique patterns. This step allows you to incorporate custom designs, such as initials, festive icons, or artistic motifs.
- If necessary, smooth any rough edges using sandpaper for a polished finish.
- Make a small hole at the top of each tag for your string or twine.
- Allow the tags to air dry thoroughly, following the manufacturer’s instructions.
- Once dry, thread the string through the holes and attach it to your gifts.
These stamped clay projects not only serve as beautiful clay gift tags but also complement handmade cards, enhancing your decoration ideas. Each tag reflects your personal touch while ensuring your gifts stand out with creativity and charm.
Clay bead bracelets

Creating clay bead bracelets offers a fantastic opportunity for clay bead crafting enthusiasts to design their own unique pieces of handmade jewelry MyHomeStyleBlog.com is a participant in the Amazon Services LLC Associates Program, an affiliate advertising program designed to provide a means for sites to earn advertising fees by advertising and linking to Amazon.com. As an Amazon Associate, I earn from qualifying purchases.
Shopping list
- Air-dry clay
- Rolling pin
- Elastic string
- Bead tools (optional for shaping)
- Acrylic paint (optional for decoration)
- Clear sealant (optional for finishing touch)
Instructions
- Begin by selecting your favorite colors of air-dry clay.
- Use the rolling pin to flatten the clay to about 1/4 inch thick.
- Cut the clay into small shapes or roll it into round beads as per your design.
- Make holes in the beads for stringing. A toothpick or skewer works well for this.
- Allow the beads to dry completely according to the manufacturer’s instructions.
- Once dry, paint the beads if desired and let them dry again.
- String the beads onto the elastic, adjusting the length to fit your wrist.
- Finish by tying a knot at the end of the string to secure the bracelet.
Textured clay coasters

Creating textured clay coasters presents a delightful way to merge functionality with creativity. These coasters not only protect surfaces from spills but also add a unique touch to your DIY home decor. By incorporating various textures into the clay, makers can craft distinct ceramic coasters suitable for any style.
Shopping list
- Air-dry clay
- Texture tools (stamps, fabric, or natural items)
- Rolling pin
- Circular cutter or template
- Varnish for sealing
- Paint or acrylic sealer (optional)
Instructions
- Begin by preparing your workspace and gathering all materials needed for this textured clay project.
- Roll out the air-dry clay using a rolling pin to an even thickness of about 1/4 inch.
- Use a circular cutter or template to cut out the coasters.
- Imprint your chosen textures onto the surface of each piece. Be creative, using stamps or textured fabrics.
- Let the coasters dry completely as per the manufacturer’s instructions.
- Once dry, apply a coat of varnish to seal and protect your ceramic coasters, making them durable and waterproof.
- Optional: Paint or add color to your coasters for a personalized touch.
Clay wall hanging décor

Creating clay wall hanging décor is an exciting way to express your creativity while enhancing your home’s interior design. This project involves using air-dry clay to craft unique wall-hanging art that adds charm to any room. With a variety of shapes, colors, and textures, these handmade home decorations can serve as striking statement pieces.
Shopping list
- Air-dry clay
- Rolling pin
- Cookie cutters or sculpting tools
- Acrylic paints
- Paintbrushes
- String or twine for hanging
- Glue or adhesive (optional)
Instructions
- Begin by kneading the air-dry clay until it becomes pliable.
- Roll the clay out evenly with the rolling pin to about ¼-inch thickness.
- Use cookie cutters or sculpting tools to create your desired shapes.
- Make holes at the top of each piece for the string to pass through later.
- Allow the clay shapes to dry thoroughly according to the package instructions.
- Once dry, paint your clay pieces with vibrant colors to match your décor.
- Thread the string through the holes for hanging.
- Position your clay wall decor on a focal wall to transform your interior design.
Mini clay jewelry boxes

Creating mini clay boxes serves as an excellent way to combine functionality with artistry. These charming containers provide great jewelry MyHomeStyleBlog.com is a participant in the Amazon Services LLC Associates Program, an affiliate advertising program designed to provide a means for sites to earn advertising fees by advertising and linking to Amazon.com. As an Amazon Associate, I earn from qualifying purchases. MyHomeStyleBlog.com is a participant in the Amazon Services LLC Associates Program, an affiliate advertising program designed to provide a means for sites to earn advertising fees by advertising and linking to Amazon.com. As an Amazon Associate, I earn from qualifying purchases. MyHomeStyleBlog.com is a participant in the Amazon Services LLC Associates Program, an affiliate advertising program designed to provide a means for sites to earn advertising fees by advertising and linking to Amazon.com. As an Amazon Associate, I earn from qualifying purchases.
Shopping list
- Air-dry clay
- Crafting tools (rolling pin, knife, etc.)
- Paint and paintbrushes
- Sealer (optional)
Instructions
- Start by kneading the air-dry clay until it’s smooth and pliable.
- Roll the clay into a flat sheet and cut out the base and sides for your box.
- Shape the sides of the box and attach them to the base using a bit of water to seal the edges.
- Allow the box to dry completely as per the manufacturer’s instructions.
- Once dry, personalize your box with paint, adding unique designs that reflect your style.
- Optional: Apply a sealer for added protection and durability if desired.
Clay keychains

Creating clay keychains offers an enjoyable way to express your creativity while crafting personalized accessories MyHomeStyleBlog.com is a participant in the Amazon Services LLC Associates Program, an affiliate advertising program designed to provide a means for sites to earn advertising fees by advertising and linking to Amazon.com. As an Amazon Associate, I earn from qualifying purchases.
Shopping list
- Airdry clay
- Keychain rings
- Clay tools for detailing
- Paint or markers (optional for decoration)
- Varnish or sealant (optional for durability)
Instructions
- Start by kneading the air-dry clay until it becomes soft and pliable.
- Shape the clay into your desired design for the keychain. This could be anything from simple shapes to intricate figures.
- Create a hole at the top of the design where the keychain ring will attach. Make sure it’s wide enough for the ring to fit comfortably.
- Allow the keychain to dry completely, following the manufacturer’s instructions for drying time.
- If desired, paint or decorate your keychain with markers once it is dry.
- Finish by attaching the keychain ring, ensuring it is secure.
Clay candle holders
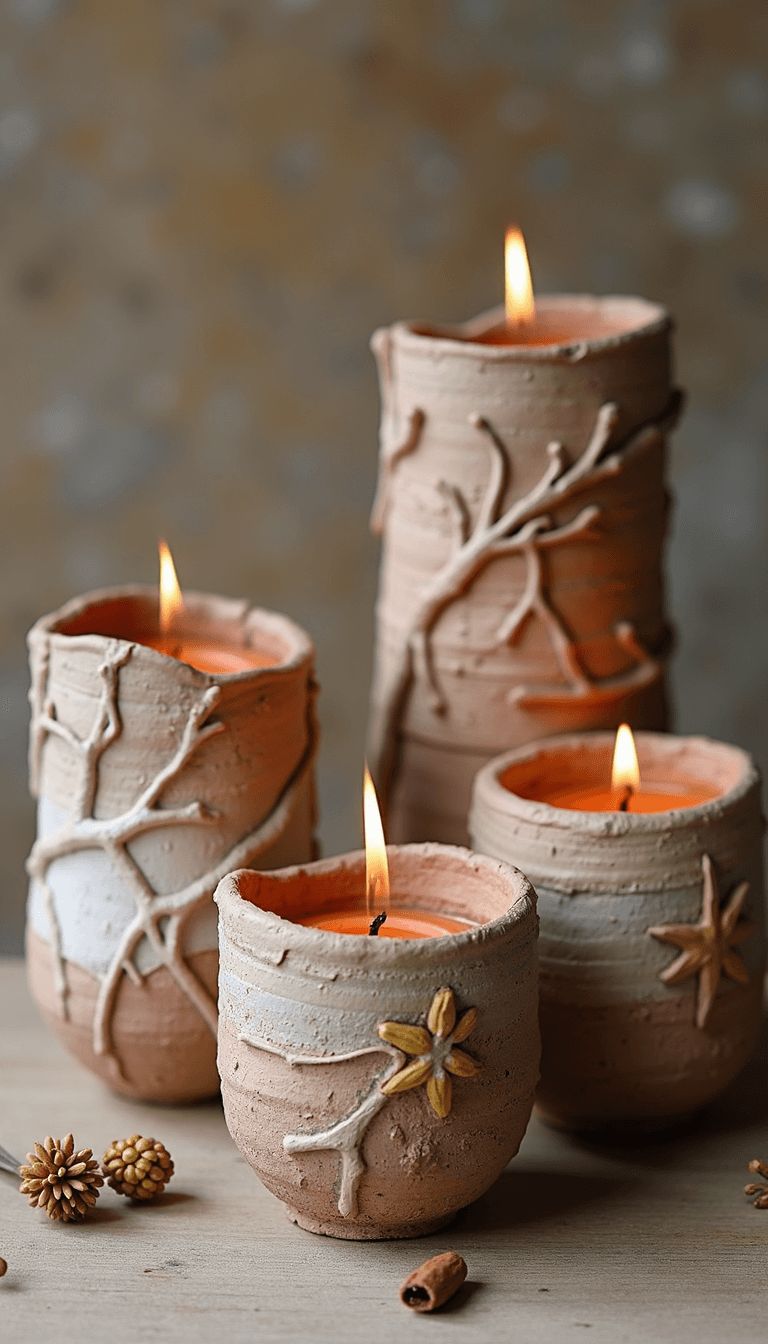
Creating clay candle holders is a fantastic way to explore your creativity while enhancing the ambiance of your living space. These versatile home decor projects let you experiment with different designs and colors, resulting in stunning handmade items that reflect your personal style. Whether you’re aiming for a rustic charm or a sleek modern look, these unique lighting solutions can be tailored to fit any decor theme.
Shopping list
• Air-dry clay
• Small candle or tealight holder
• Decorative paints
• Rolling pin
• Sculpting tools
• Paints that match your home color palette
Instructions
- Knead your chosen clay until it’s soft and pliable.
- Roll the clay out to an even thickness.
- Cut shapes from the clay to form the base of your candle holder.
- Place a small candle or tealight holder in the center of the clay base.
- Mold the clay around the candle holder to secure it in place.
- Allow the clay candle holder to dry completely.
- Once dry, paint your candle holder to add a personal, decorative touch.
- Display and enjoy your finished clay candle holders as both functional and eye-catching decor.